
A Tiny History of Git and Why You Should Care
Git was created by Linus Torvalds in 2005, the same genius who built Linux. It was born out of necessity when the Linux community needed a version control system that was fast, distributed, and free.
Today, Git powers everything from hobby projects to massive codebases like those at Google, Microsoft, and Facebook. Whether you're working on a personal website or contributing to open-source, Git is the industry standard.
Where is Git Used?
Software Development (obviously!)
Documentation Projects
Collaborative Design Workflows
Versioning for Configuration Files
If it involves files that change over time, Git can manage it.
Key Git Terminologies
1. Repository (Repo)
A directory where your project's Git history is stored. It's like a folder, but smarter.
2. Staging Area
Think of this as a "waiting room" where changes sit before you officially save them in the project history.
3. Commit
A snapshot of your project at a specific point in time. This is how you save your work in Git.
4. Push
You “push” commits to a remote repository (like GitHub) so others can see your work.
5. Remote
A version of your project that’s hosted on the internet or another network.
Setting Up Git for the First Time
1. Install Git
Download from git-scm.com
2. Configure Your Identity
Before you do anything, tell Git who you are. We do this by telling git what is our username and email
git config --global user.name "Your Name"
git config --global user.email "your.email@example.com"
3. Initialize a Git Repository
Navigate to your project folder and run:
cd /path/to/your/project's/root
git init
This creates a .git folder in your project. If you don't know, folders starting with a "." are hidden folders so you might not see it in the folder tree. This is where the information about your codebase is saved.
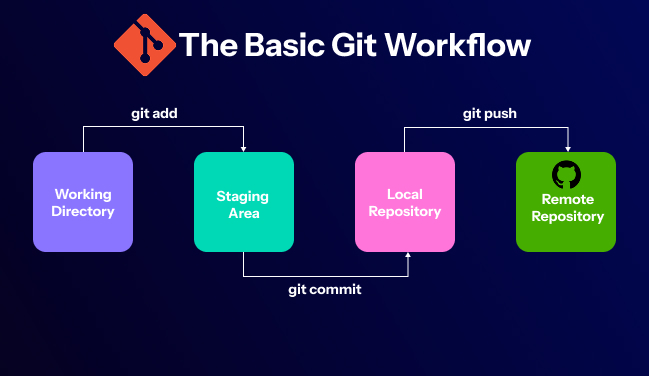
Tracking Changes (Staging & Committing)
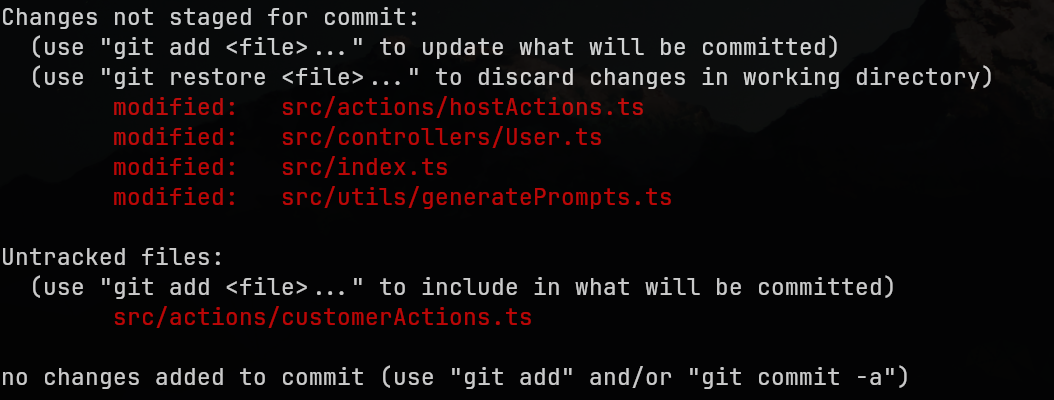
Check Project Status
git statusThis shows which files have been changed, which are staged, and which are not. You will see something like this in your terminal.
Add Files to Staging Area
git add filename.txtOr add everything:
git add .This is one step before committing your changes. Note that the files added to the staging area are the only ones going to be committed. All other files will be "unstaged files"
Committing the Changes
git commit -m "Add feature X"Git expects you to associate every commit with a message. After running this command, a snapshot of your staged changes will be saved as a "commit".
Viewing Commit History
git logThis shows all commits in your repo. Use q to exit log view.
The HEAD in Git points to the current snapshot (commit) you are working on. Think of it as “where you are” in your project history.
Understanding Branches
A branch in Git is like creating an alternate universe for your code where you can try out new features without disturbing the main project. I would call this the most amazing feature offered by Git. Think of it as you are working on a feature and committing the changes step by step.
Eg : Initialize Project -> create homepage -> add images -> change fonts . . .
But parallel to this workflow, you also want to create a new feature say "Authentication" in the same project and without disturbing the main flow.
When you first initialize your project, the default branch you work on is either "master" or "main"
Create a New Branch
git branch new-featureSwitch to That Branch
git checkout new-featureOr Do Both in One Command
git checkout -b new-featureList All Branches
git branchDelete a Branch
git branch -d old-featureYou can learn more about "Merging Branches" from here. It is an advanced git concept, hence it will not be discussed here.
Push Your Code to GitHub
Till now, we have created our repo, some commits (our checkpoints) and also branches. But all of this resides in our local machine. If anything goes wrong your pc, all of your data will be lost. For this purpose we have "Github", a place where you can upload your code so that it stays safe.
Following theses steps you can do it easily.
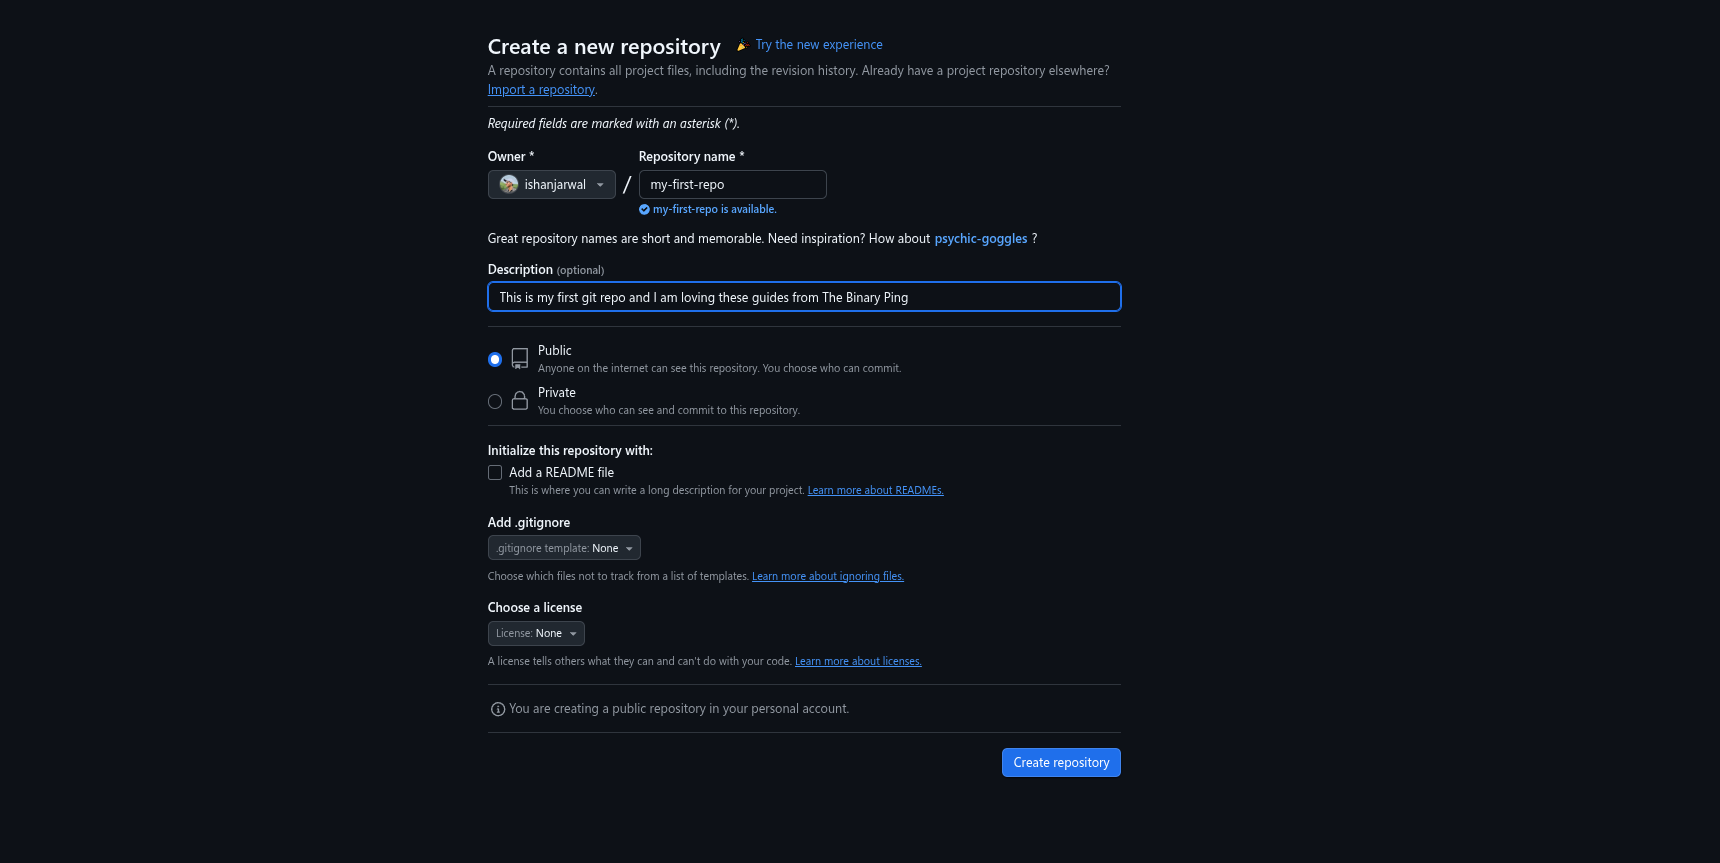
Create a Github account and the repo.
First step is to create your github accout. Simply add your details, verify your account and your are good to go.
Now you can click the "Create New Repository" button, give it a name, make it public/private according to you and hit create.
Now your remote repository is created and we need to connect it to our local git project, to do that, follow these steps
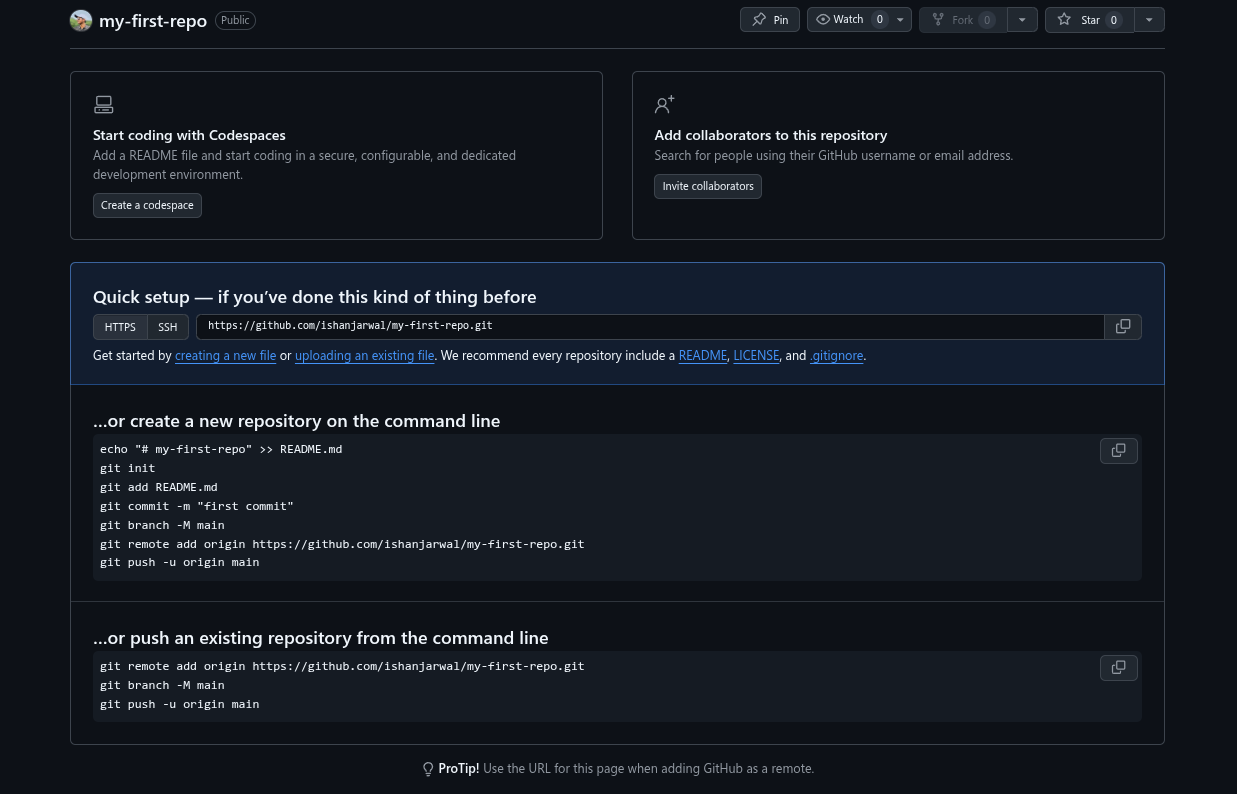
Add Remote URL
git remote add origin https://github.com/yourusername/your-repo.githere, origin is nothing but an alias for your remote repository, you can see all the aliases by this command
git remote -vPush to Remote
git push -u origin mainThis will "push" or upload our codebase to our remote repository. The "-u" flag tells Git to set the remote branch (origin/main) as the upstream (or default) branch for your local branch (main).
Congrats, your code is now safe on github.
Bonus Tips: Git in VSCode
If you prefer clicking buttons over typing commands, Visual Studio Code has an excellent Git GUI.
Must-have VSCode Git Extensions:
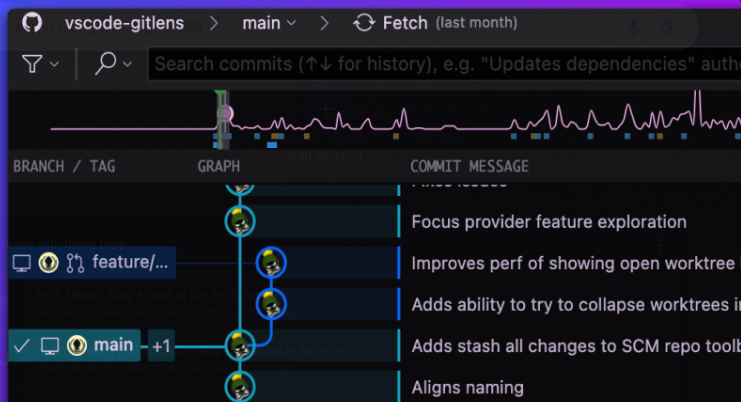
GitLens: Supercharge your Git experience.
Git Graph: Visualize your branches and commits.
GitHub Pull Requests and Issues: Manage PRs from within VSCode.
What’s Next?
This guide covers the comfy essentials to get you started. In the next post, we’ll explore advanced Git concepts like merge conflicts, rebasing, reverting commits, and more.
For now, get your hands dirty and start committing!
That’s it! You’re now Git-ready.


