
Introduction
Arch Linux is famed for its simplicity and control, but the installation process often feels daunting to newcomers. The truth is installing Arch doesn’t have to be a nightmare. In this guide, we’ll walk through installing Arch Linux in a way that balances ease of setup with full system configurability. No overwhelming jargon, no unnecessary scripts — just a clean, methodical approach where you stay in control.
NOTE : This installation guide will only work on UEFI systems (relatively new computer systems). Which means for legacy BIOS systems, you'll have to follow other methods which will be discussed later.
Minimum system Requirements
As per the official Arch Wiki, Arch Linux should run on any x86_64 compatible machine with a minimum of 512 MiB RAM, though more memory is needed to boot the live system for installation. A basic installation should take less than 2 GiB of disk space. As the installation process needs to retrieve packages from a remote repository, this guide assumes a working internet connection is available.
Step 1 : Creating a bootable USB
First, we will need to create a bootable USB which will contain our boot environment. For that follow these steps :
1. Intall the Arch ISO file
On the official download page, scroll down a bit until you see a list or mirrors. Select the mirror nearest to your geographical location and download the Disk Image file.
2. Create a bootable USB
Plug in your USB and use rufus (or any other prefered program) to create a bootable USB.
In the device dropdown, select your USB
In the boot selection menu, select the Disk Image file that you downloaded.
Select GPT as the partition Scheme and UEFI as the target system.
Hit on Start and wait until done.
After that close rufus and eject your USB.
If you are already on a linux distro, use ventoy or dd for creating a bootable drive
Step 2 : Boot Environment
Plug in your USB and restart the PC in which you want to install Arch Linux. Now we need to enter into the BIOS settings to boot from our USB. BIOS key might differ based on the pc manufacturer. Some common ones are F2, Esc, F10, F12.
Once in the BIOS, either change the boot order or Boot from your USB if listed.
Hit Enter on the Arch Linux Installation
Tips for the terminal interface
type the command
setfont -dto increase the font size.to clear the terminal screen, use the shortcut
Ctrl+Lto stop executing a command or to move out of an interface, use the shortcut
Ctrl+C
Step 3 : Keyboard Layout
By default, the keyboard layout is set to US (which is probably what everyone will need). But if you need another keyboard layout, just type this command :
loadkeys it // for italianor switch it back to us
loadkeys usStep 4 : Connecting to the internet
To install our packages, we need an internet connection.
If you have an ethernet cable and your PC supports it, go ahead and connect your cable to the PC.
If you want to use wifi instead, use the iwctl utility
Type :
iwctlto enter into interactive mode. (you'll see the [iwd]# prefix)
To list all available commands:
[iwd]# helpConnect to a network
First, if you do not know your wireless device name, list all Wi-Fi devices:
[iwd]# device listIf the device or its corresponding adapter is turned off, turn it on:
[iwd]# device name set-property Powered on[iwd]# adapter adapter set-property Powered onThen, to initiate a scan for networks (note that this command will not output anything):
[iwd]# station name scanYou can then list all available networks:
[iwd]# station name get-networksFinally, to connect to a network:
[iwd]# station name connect SSIDIf the wifi is password protected, you'll be prompted to enter it. Or you can do it in one line as
$ iwctl --passphrase passphrase station name connect SSIDTo learn more about iwd, visit the iwd Arch wiki
Testing our connection
It is important to test if our connection is established successfully. To do this, we will use the ping utility
ping archlinux.orgIf you receive something like this, then your connection is successful
PING archlinux.org (2a01:4f9:c010:6b1f::1) 56 data bytes
64 bytes from archlinux.org (2a01:4f9:c010:6b1f::1): icmp_seq=1 ttl=51 time=204 ms
64 bytes from archlinux.org (2a01:4f9:c010:6b1f::1): icmp_seq=2 ttl=51 time=308 ms
64 bytes from archlinux.org (2a01:4f9:c010:6b1f::1): icmp_seq=3 ttl=51 time=228 ms
64 bytes from archlinux.org (2a01:4f9:c010:6b1f::1): icmp_seq=4 ttl=51 time=251 ms
Tip
lsblkis a useful command to list all the partitions. It returns something like this :NAME MAJ:MIN RM SIZE RO TYPE MOUNTPOINTS nvme0n1 259:0 0 476.9G 0 disk |-nvme0n1p1 259:1 0 100M 0 part /boot/efi |-nvme0n1p2 259:2 0 4G 0 part [SWAP] |-nvme0n1p3 259:3 0 100G 0 part / `-nvme0n1p4 259:4 0 372.8G 0 part /mydata
Step 5 : Disk Partitioning
It is one of the most important steps of installing any OS, especially Arch as we will be configuring everything ourselves. Often times, people find it difficult to partition the disks or to choose the best partition table. I will tell you the most effective partition scheme.
For disk partitioning, we will use cfdisk utility. Arch Wiki recommends fdisk however, I don't find it intuitive.
To enter into the cfdisk interface type :
cfdiskYou should see something like this :
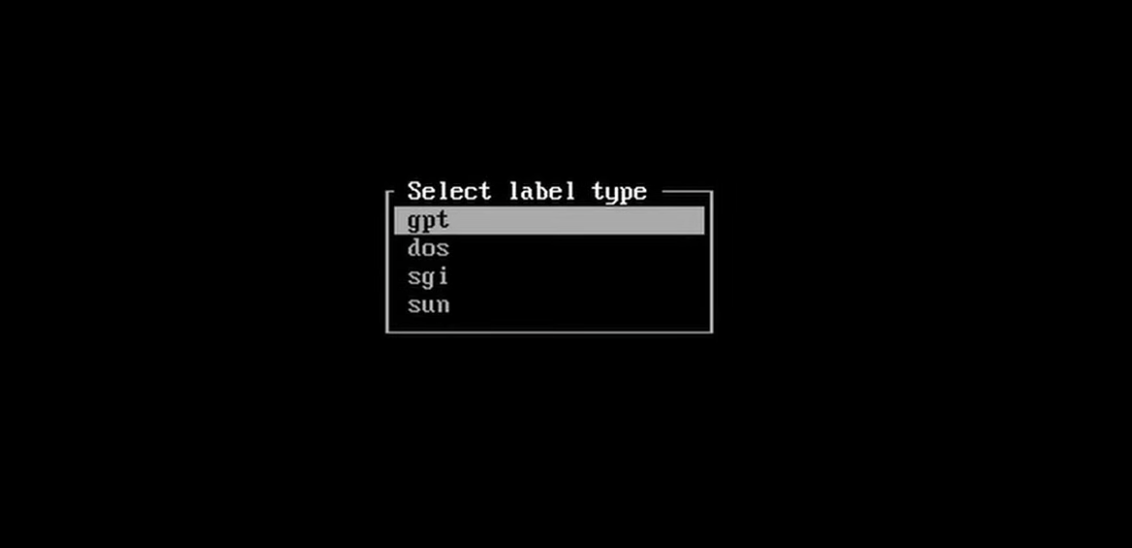
Select gpt (as we are on a UEFI system)
Don't worry if you don't see this screen and instead end up on this screen by default:
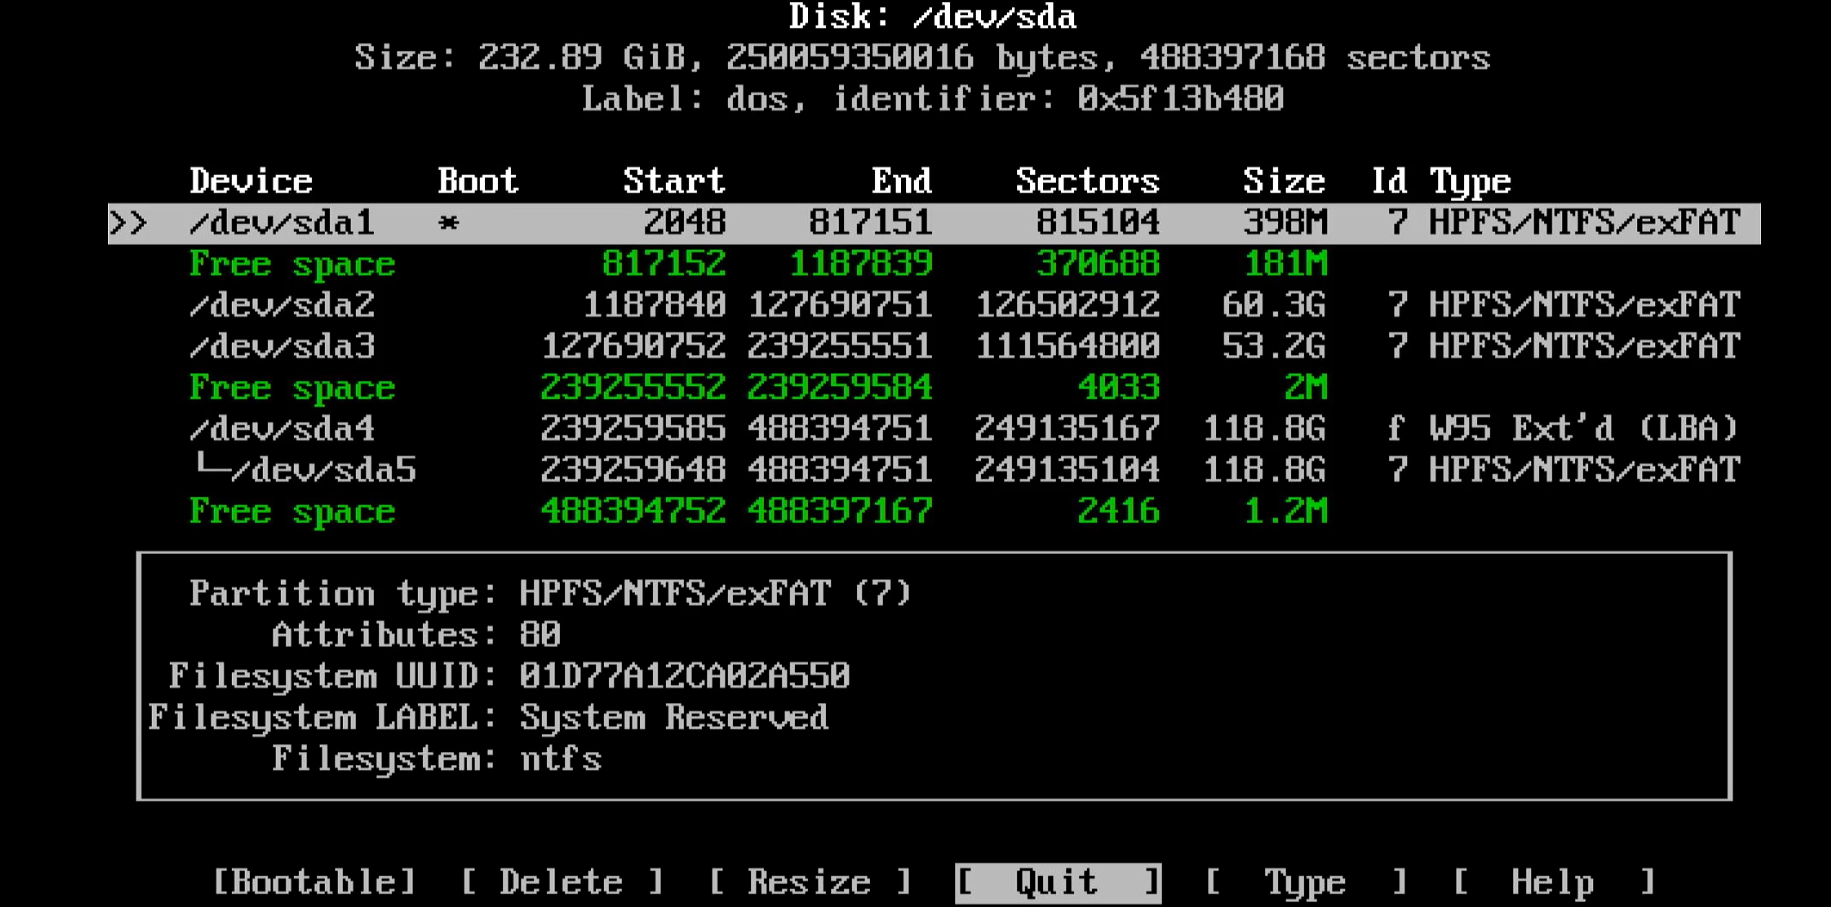
Or if you end up with an output that says cfdisk: cannot open /dev/sda: No such file or directory , then you should use the lsblk command to see the name of your disk and then use this :
cfdisk /dev/nvme0n1 (if nvme0n1 is the disk name)Now we need to clear all the existing disk partitons and create a free space.
Use the Up and Down keys to move between partitions
Use Left and Right keys to move between options.
Delete every partition and you will see Free space like this :
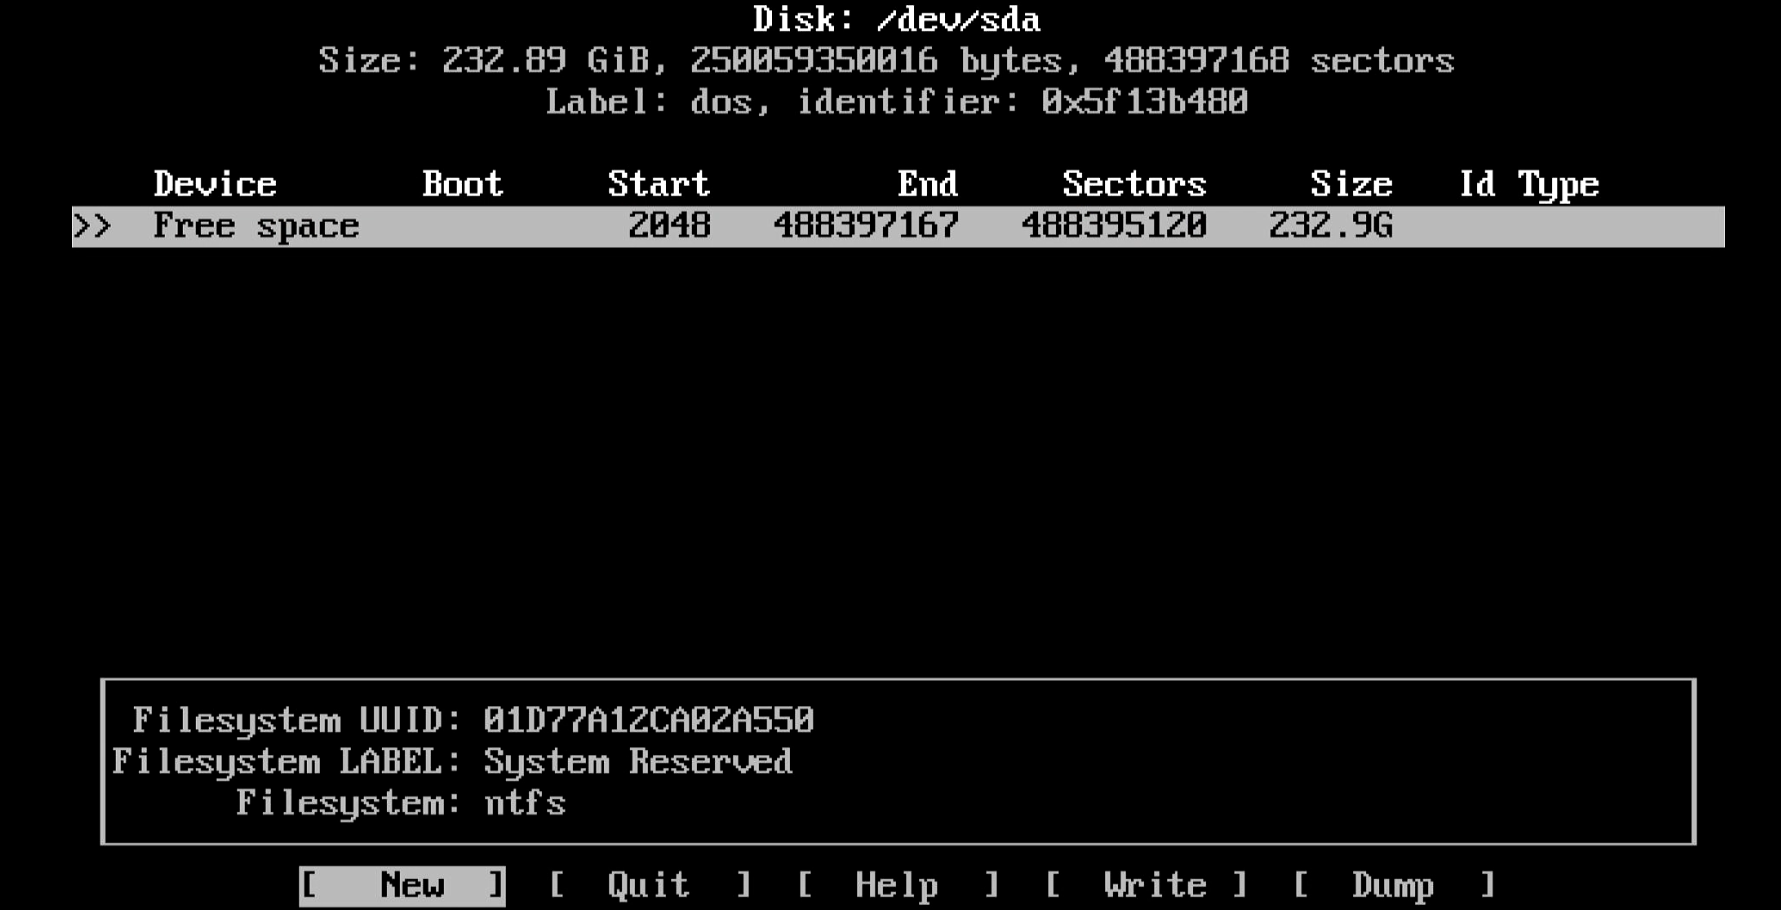
Note : Nothing happens to the partition table unless you "Write" your changes, so if you change your mind, you can just "Quit" the interface and your partitions and data will persist.
Creating New Partitions
Click on "New" option to create a new partition.
It will ask you for the size. You can use initials for size like "100M" for 100 Megabytes or "100G" for 100 Gigabytes.
But what should be the best parition schema ?
Partition Schema
Partition | Size | Mount Point |
|---|---|---|
Boot Partition | 100M | /boot/efi |
Virtual Memory Partition | 4G | /SWAP |
Root partition | 100G | / |
Personal Data | Remaining | /mydata |
Write the partition table
Use the "Write" option to write this partition table. It will prompt you for confirmation, just hit enter and then "Quit" the cfdisk interface.
Step 6 : Formatting Partitions for appropriate Filesystem.
1. Root Partition
To format the root partition (where our system files will be stored), we will use the ext4 linux file system. use the following command :
mkfs.ext4 /dev/nvme0n1p3you will have to replace /dev/nvme0n1 with the root parition of your system. use lsblk to see the name of root partition(which is the root partition).
2. Boot Partition
We will use the FAT32 file system (which is required) for the boot partition.
mkfs.fat -F 32 /dev/nvme0n1p1 replace the partition name with your boot partition.
3. SWAP partition
Is pretty straightforward, just use
mkswap /dev/nvme0n1p2replace with your swap partition
4. Personal Data Partition
Since we have created a personal data partition for storing our personal files, separately from the root partition, we will format this partition with ext4 as well.
mkfs.ext4 /dev/nvme0n1p4Step 7 : Mounting the Partitions
we are now ready to mount our formatted partitions to the correct points. We will use the mount command to do this. But keep in mind that we are in a boot environment right now so our / will be /mnt
Use the following commands one by one to mount the partitions
// for root partition
mount /dev/nvme0n1p3 /mnt

// for boot partition (but it doesn't exist so create it first)
mkdir -p /mnt/boot/efi
mount /dev/nvme0n1p1 /mnt/boot/efi

// for personal data partition
mount /dev/nvme0n1p4 /mnt/mydata (or use any name you like)

// for SWAP partition
swapon /dev/nvme0n1p2
Step 8 : Installing the base system
Now that we are done with most of the pre installation setup, its time to install the linux kernel into the system. As the arch wiki recommends pacstrap script, we will use it to install base packages and some essential packages as well.
What we will install :
base, linux and linux-firmware : Required
sof-firmware : for newer sound card support (optional)
base-devel : for features like sudo
grub and efibootmgr: boot manager and support for efi systems
nano : in-terminal text editor
networkmanager : for managing networks
here is a single line command to install all of these
pacstrap /mnt base linux linux-firmware sof-firmware base-devel grub efibootmgr nano networkmanagerHit enter and let it do the magic.
Step 9 : Generating fstab
To check the mount ports run :
genfstab /mntit will list the partitions with the mount points, but we need to save it to our system to that it knows where to mount these partitions as currently we are in a boot environment and not in our system. To do that run :
genfstab /mnt > /mnt/etc/fstabwe are sending the output of the command to the /etc/fstab file in our system.
To verify, run cat /mnt/etc/fstab
Step 10 : Entering and configuring our installed system
1. Changing the root and entering our system
arch-chroot /mnt2. Setting the timezone
// To list all the timezones
ls /usr/share/zoneinfo
ls /usr/share/Asia  (for example)

// setting the timezone
ln -sf /usr/share/zoneinfo/Asia/Dubai /etc/localtime

// verify it
date

// synchronize it with system clock
hwclock --systohc
3. Localization
We will now edit the /etc/locate.gen file to set our locale. I am using the en_US. nano into the locale.gen file and remove the # prefixed with the desired locale.
nano /etc/locale.gen

// example
.
.
 #en_SG.UTF-8 UTF-8
 #en_SG ISO-8859-1
 #en_US.UTF-8 UTF-8
 en_US ISO-8859-1
 #en_ZA.UTF-8 UTF-8
 #en_ZA ISO-8859-1
.
.
After editing, press Ctrl+O and then Enter to save the file and then Ctrl+X to exit.
Now we will generate the locale
locale-genThen nano into the /etc/locale.conf file and specify the LANG like so
nano /etc/locale.conf  (most probably an empty file)

// type this in the file
LANG=en_US.UTF-8
Save the file and exit nano
4. Keymap (Keyboard layout)
This is optional as we have US keyboard layout which is mostly needed. But if you wish to change it, just nano into the /etc/vconsole.conf and specify your keymap like this : KEYMAP=us or KEYMAP=it (for italian) or whatever you prefer. Save the file and exit nano.
Step 11 : Setting the host and the users.
1. Setting the Hostname
To set a hostname of the computer, edit the /etc/hostname file with nano and type the name for your PC. like Archie . Save the file and exit nano.
2. Setting the root password
To set the root password,
passwd
New Password: (type a strong password here)
Retype new password: (retype the password)
passwd: password updated successfully
3. Creating a normal user
You don't wanna be using your pc with the root user for most things. so we create a user (with limited privilleges)
To do this, type
useradd -m -G wheel -s /bin/bash any_nameHere,
-m creates a home directory for the user
-G wheel adds the user to the wheel group (more on this later)
-s /bin/bash specifies the shell for the user
any_name is just a name of your choice for the user
To set the password for this user,
passwd user_nameNOTE : if you don't add a password for a user, that user will be locked and you will not be able to login with that user.
To switch between users, use :
su user_name
Step 12 : Setting up sudo
To perform tasks that require the superuser privilleges, we need to add our user to the sudoers file. Remember we added our user to the wheel group. Now we will allow all users in the wheel group to use the sudo command.
First exit the current root by
exitSpecify the editor and edit the sudoers file
EDITOR=nano visudoScroll down a bit and find this line and uncomment it.
## Uncomment to allow members of group wheel to execute any command
%wheel ALL=(ALL:ALL) ALL
Save the file and exit nano.
Step 13 : Starting our fresh Arch Linux
Before booting into our freshly configured Arch linux system, first we need to enable some core services. For now, we will enable the network manager as this is the only core service we installed.
systemctl enable NetworkManagerLet's now enable the Boot manager. To do that first we will install GRUB into our disk by :
grub-install /dev/nvme0n1 (or whatever your disk name is)To configure grub, type
grub-mkconfig -o /boot/grub/grub.cfgNow, exit from the current environment and unmount all the partitions
exit
umount -a
Lets reboot our system into the system
rebootChoose Arch Linux in the GNU GRUB menu
Congrats, you are finally into your own arch linux system. But its not over yet.
Login with your user by entering the username first and then the password.
First, Test the internet connection by ping archlinux.org
if not connected, use nmcli or nmtui to connect to a network.
Step 14 : Installing KDE Plasma Desktop Environment
You can use a desktop environment of your choice or even create your own config of hyprland, but for simplicity and a beginner-friendly environment, I recommend KDE Plasma (especially if you are migrating from windows).
To install it, use pacman :
sudo pacman -S plasma sddmWe are also installing sddm which is a login manager we will use to login into our desktop environment.
Before that, install some essential packages like a terminal emulator, an internet browser etc.
sudo pacman -S kitty firefox Enable SDDM and start it now
systemctl enable sddm (enables it on boot)
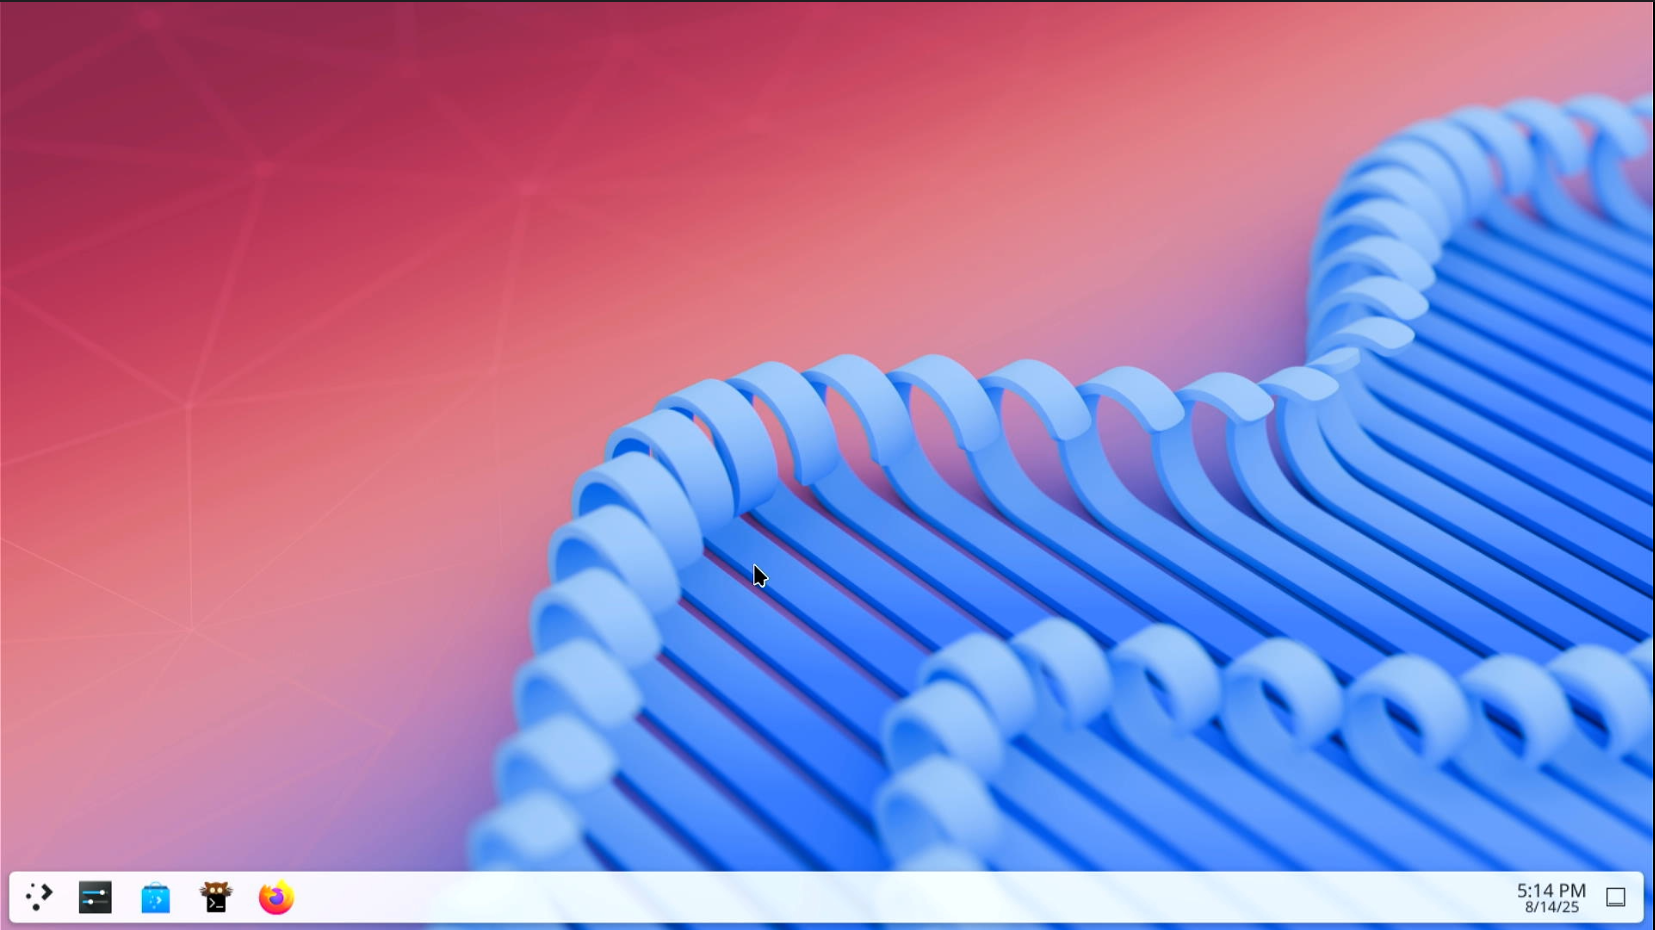
systemctl enable --now sddm (for starting it now)Enter your credentials and boom, you are now inside KDE. You can play around with things to get your hands on it. But before that, lets install and run neofetch to make this guide fruitful.
sudo pacman -S neofetch; neofetchAnd that was it from my side on the Arch Linux Guide. For configuring a beautiful KDE environment or to modify our terminal, we will meet in another guide.
I hope the guide was simple and easy.
Enjoy the Arch experience.


